Lived in three studios. Went broke decorating the first one wrong. Now I write about small-space living so other guys don’t make the same dumb mistakes I did.
My first cozy small studio apartment was 360 square feet and smelled faintly of whoever lived there before me. The overhead light had a hum. The walls were that specific shade of white that says “no one cared about this apartment.” I put my mattress on the floor, stacked my boxes in the corner, and told myself I’d sort it out later.
Later turned into eight months of living in a space that never felt like mine. I kept buying random stuff from IKEA — a fake plant, a floor mat, some storage cubes — and none of it made any real difference. The place still felt like a hotel room I’d slightly messed up.
It wasn’t until I moved into my second studio that I started figuring out what actually works. And then my third one confirmed it. These 30 ideas are the honest result of trial, error, and some genuinely embarrassing amounts of money spent on things that didn’t help at all before I found the things that did.
This is a cozy small studio apartment guide written by a guy who actually lives in one — not someone who browsed Pinterest for three hours and repackaged it as advice. Every idea on this list is something I’ve personally tested.
Read these 5 things before you spend a single dollar
I bought $400 worth of stuff for my first studio that made basically zero difference. A rug too small to do anything. String lights I strung the wrong way. A fake succulent that looked like it came from a gas station. None of it worked because I didn’t understand the rules underneath everything.
Here they are. Learn these first and the rest of this guide clicks into place.
THE 5 RULES — INTERNALIZE THESE, THEN SPEND MONEY
- Bad lighting ruins everything else. You can have the best furniture in the world and the wrong light makes it look like a storage unit. Fix this before anything else.
- Texture is warmth. Hard flat surfaces feel cold. Soft layered surfaces feel safe. Your brain reads texture as comfort — this is not a vibe thing, it’s a wiring thing.
- One open room never fully relaxes you. When your bed, sofa, desk, and kitchen all bleed into each other, your nervous system stays in a low-grade alert state. You need signals that say “this area is different from that one.”
- Every piece of furniture earns its floor space or it leaves. Studio floor space is basically gold. A table that only holds stuff is a waste of it. Get things that do two or three jobs.
- Warm tones or forget it. Cool white walls and grey everything feels like a WeWork pod. Cream, oat, terracotta, and warm wood feel like somewhere you’d actually want to spend a Sunday.
Okay. Now let’s get into the actual list.
Lighting ideas for a cozy small studio apartment
My mate spent $600 redoing her studio — new sofa, new rug, new cushions. Still looked grim. I went over one evening and the first thing I asked was what bulbs she had. Cool white, 6500K, the ones that come with the flat. Changed them while I was there. She texted me the next day saying the place finally felt liveable. Don’t be my mate. Start with the lights.
01- Change every bulb in the apartment to 2700K warm white
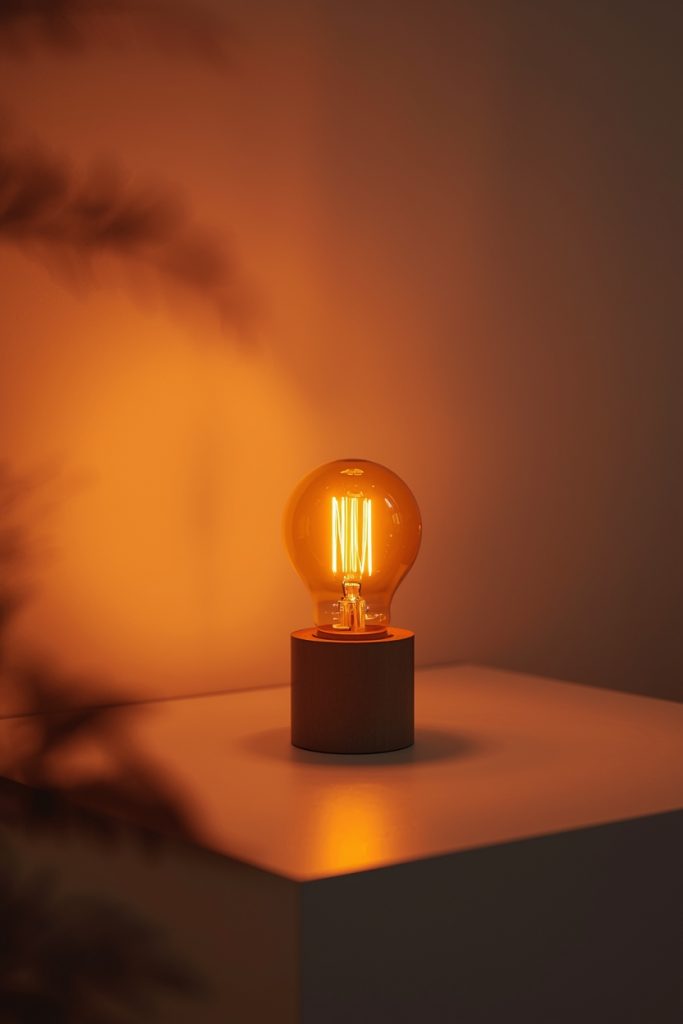
Stop what you’re doing and go check the bulbs in your studio. If they say anything above 3000K on the box — or if the light looks bluish or harsh white — that’s why your studio feels like an office at 9pm instead of a home.
2700K warm white LEDs are the fix. Walls look golden. Wood looks richer. The whole room shifts from “functional box” to something that feels genuinely lived-in and warm. A six-pack of decent warm LEDs runs about $12 on Amazon. I’ve done this in every place I’ve moved into since my second studio and the difference never stops being satisfying.
One more thing: Don’t leave one cool bulb in the kitchen while everything else is warm. The temperature clash makes both areas look worse. Go all-in on one tone throughout.
02- Get an arched floor lamp — put it behind the sofa, not beside it
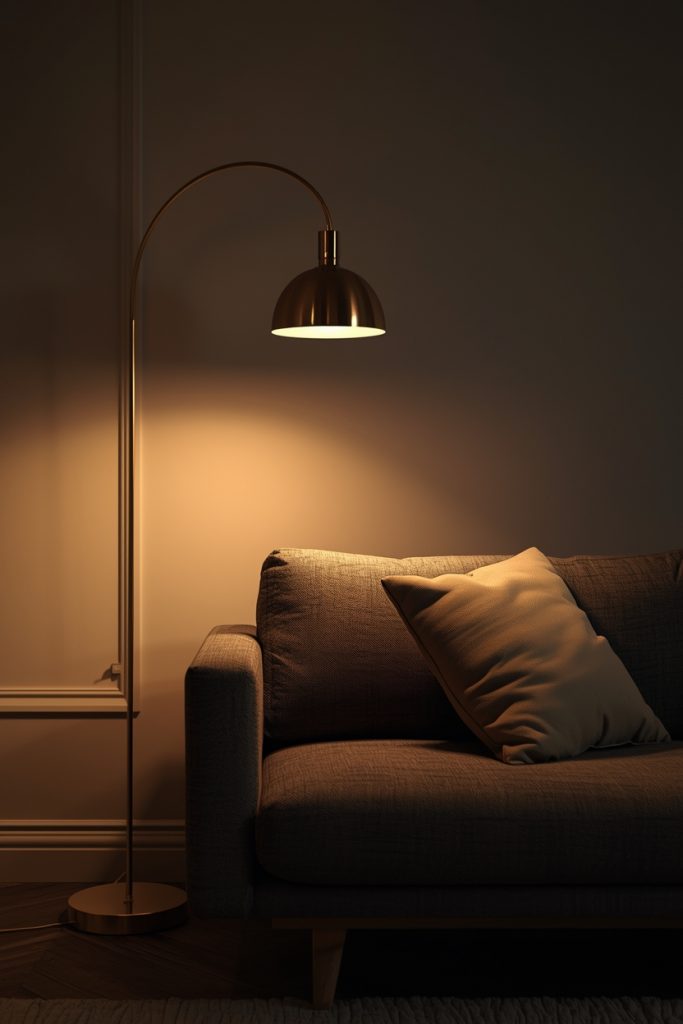
I thought floor lamps were something your grandad had. Then I grabbed one secondhand off Facebook Marketplace for $25 and put it behind my sofa. The arc sits overhead like a private spotlight. That one lamp, on its own in the evening, makes the seating area feel like a separate zone from the rest of the studio — and that zone feels warm, intentional, and genuinely nice to sit in.
Get a fabric shade — linen or cotton, not plastic. Plastic shines a harsh cone; fabric scatters the light gently in every direction. If it has a dimmer switch built in, pay the extra few quid. You’ll be adjusting it every single day.
03- Run warm string lights along the ceiling perimeter — not the window
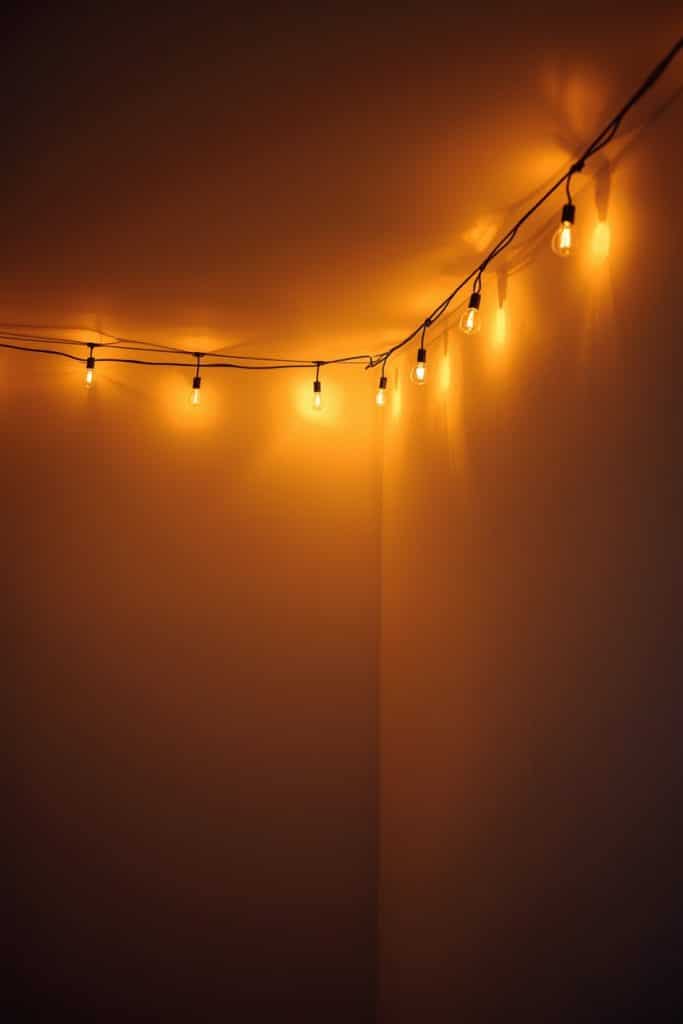
Everyone’s had fairy lights draped lazily over a window frame at some point. That’s not what I’m talking about. What I’m talking about is a single continuous run of warm white micro-lights mounted where the ceiling meets the wall, all the way around, using small adhesive clips. No nails. No damage. Takes about 25 minutes.
Turn everything else off and switch these on. The ceiling drops. The room wraps around you like a lantern. It’s one of those things that sounds like a minor decor move and ends up being the thing you use every single evening for years. I ran mine for two solid years in my second studio and used them more than any other light in the place.
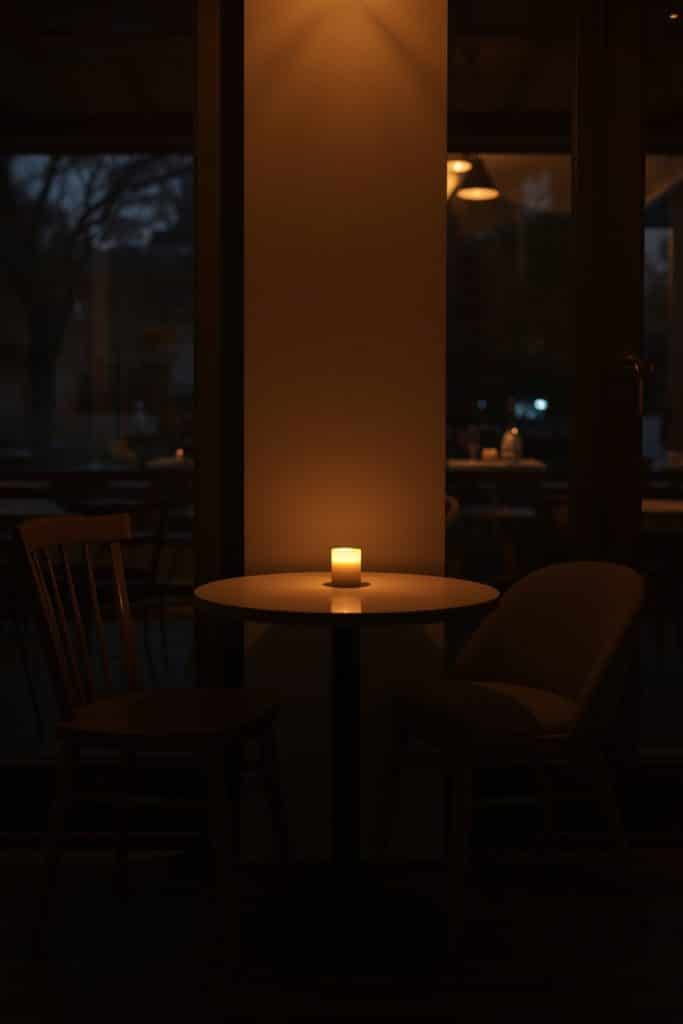
04- Put three candles on a wooden tray on the coffee table
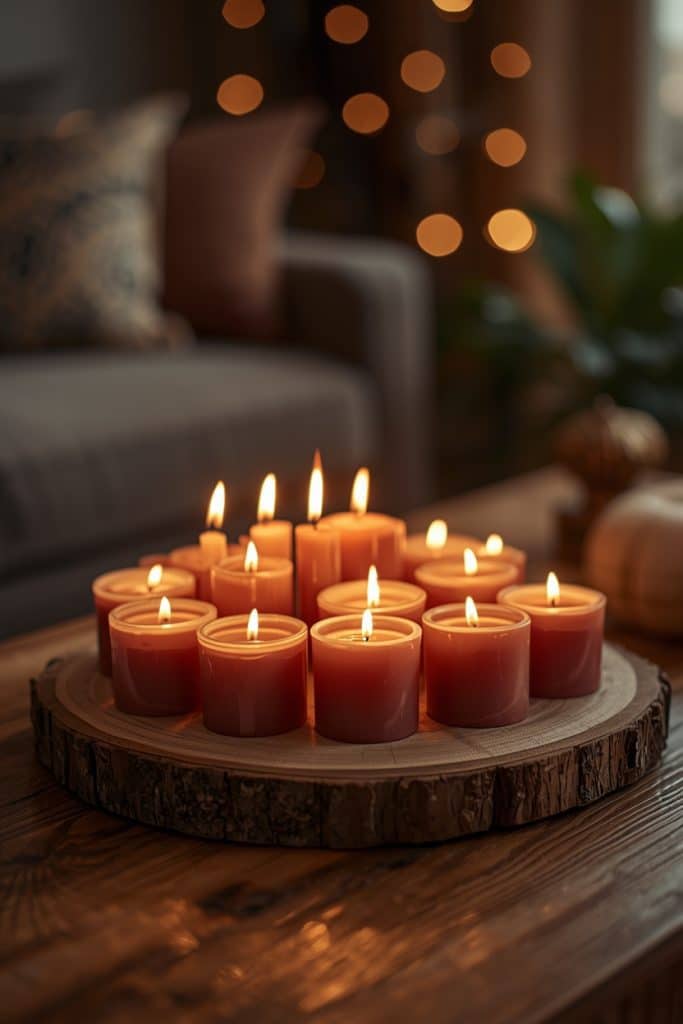
Three candles, a wooden tray or cutting board, heights slightly varied — tall at the back, medium in the middle, small at the front. That’s the whole idea. It sounds stupidly simple and it works stupidly well.
What makes candles different from a lamp isn’t the warmth — it’s the movement. A flame flickers. A flickering light in a still room makes the whole space feel alive in a way that no electric bulb does, no matter how warm the tone. If you’re nervous about open flames in a small space, the good flameless pillar candles are convincing enough now that I’ve had people lean in to blow them out. A cheap set of three scented ones runs about $15–18.
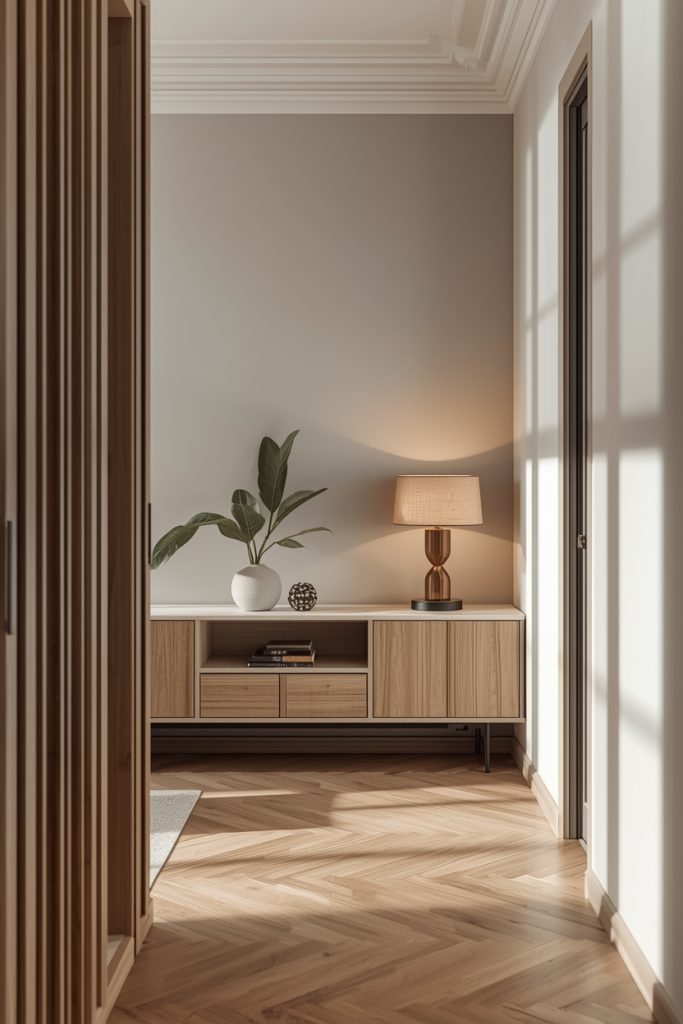
05- Put a small table lamp on the nightstand — and stop using the overhead light at night
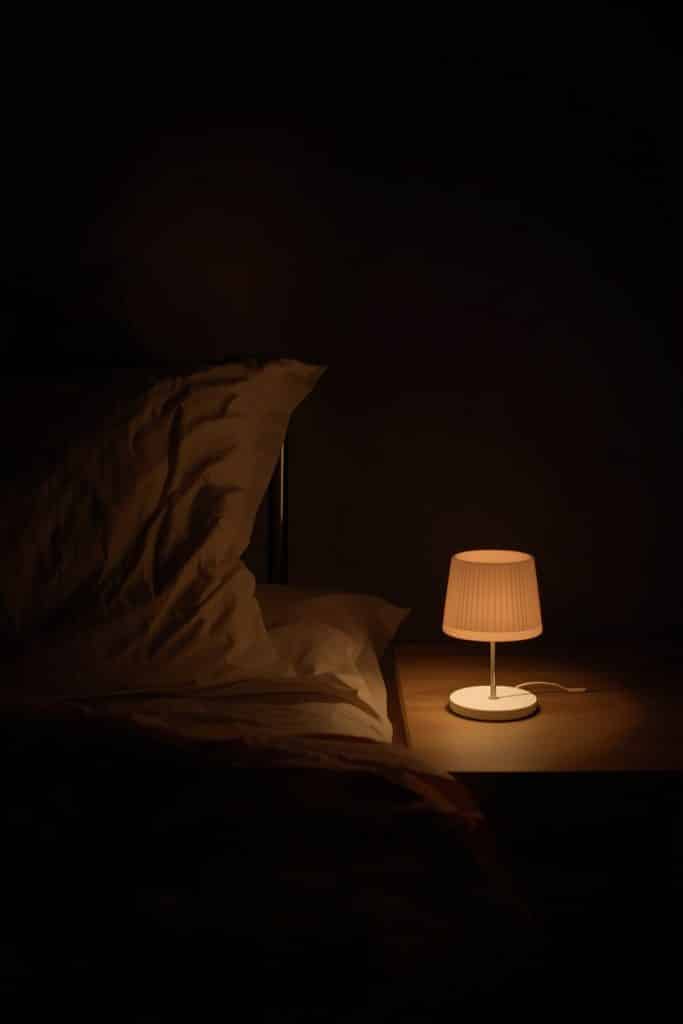
The sleeping area of a studio is a nightmare to get right because the overhead light illuminates the whole open-plan space at once. There’s no sense of a separate bedroom. A bedside lamp fixes this. It keeps the light in your corner, warms the immediate space around the bed, and gives the sleeping area a private, enclosed feel even though it’s technically just a corner of one big room.
Pick one with a linen shade in white or cream. Nothing with a dark shade — you want the light soft, not dramatic. I picked mine up at a charity shop for $7. Still using it three years later.
You may also like: 25 Small Apartment Living Room Ideas – 15 Modern Living Room Decor Ideas for 2026
06- Plug a dimmer into at least one lamp
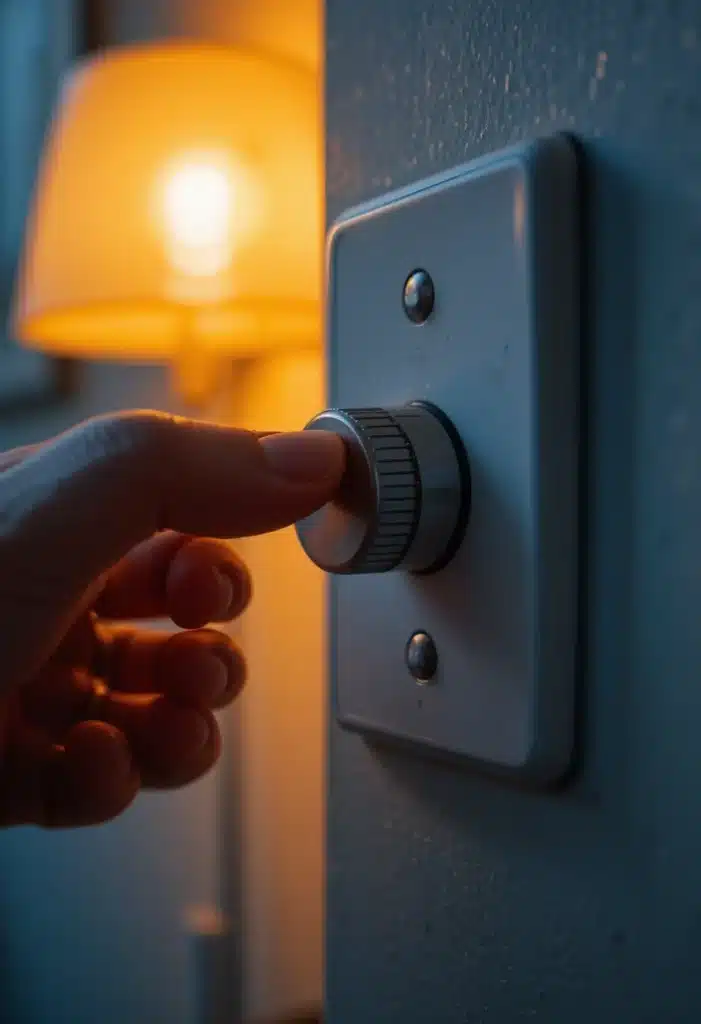
A plug-in dimmer is a small inline device — your lamp plugs into it, it plugs into the wall. No wiring. Takes 30 seconds. Costs about $14. And it completely changes how you use your studio.
Bright for mornings and work. Medium for cooking and eating in the evening. Low for winding down. The same lamp does all of it. I had a floor lamp in my first studio that was either on or off and I’m still annoyed about it. If you’re renting, you can take the dimmer with you when you move. Works with any dimmable LED — just check the bulb packaging first.
Texture and layering for a cozy studio
Hard surfaces feel cold. Tile, painted drywall, glass, shiny furniture — all of it bounces light and sound around and makes a space feel exposed and chilly. Soft things absorb it. That’s the whole explanation for why texture matters. Your studio probably has way more hard surface than soft, and the ratio is making it feel worse than it should.
07- Get a chunky knit throw — and stop folding it

Yes, the chunky knit throw. I know. Every article says it. It’s on the list because it genuinely works and because most people style it wrong. Don’t fold it. Don’t drape it symmetrically. Toss it loosely over one arm of the sofa or bunch it at one end like you just got up from under it. The messiness is the point — it looks like someone actually lives here and actually uses the sofa.
Oatmeal, cream, camel, or dusty terracotta. Any of those work in basically any studio. I’m on my second one — first lasted two years of daily use. Budget: $25–30. Don’t spend more than that. The cheap ones photograph just as well.
08- Layer two rugs — especially if you can’t afford the one you actually want
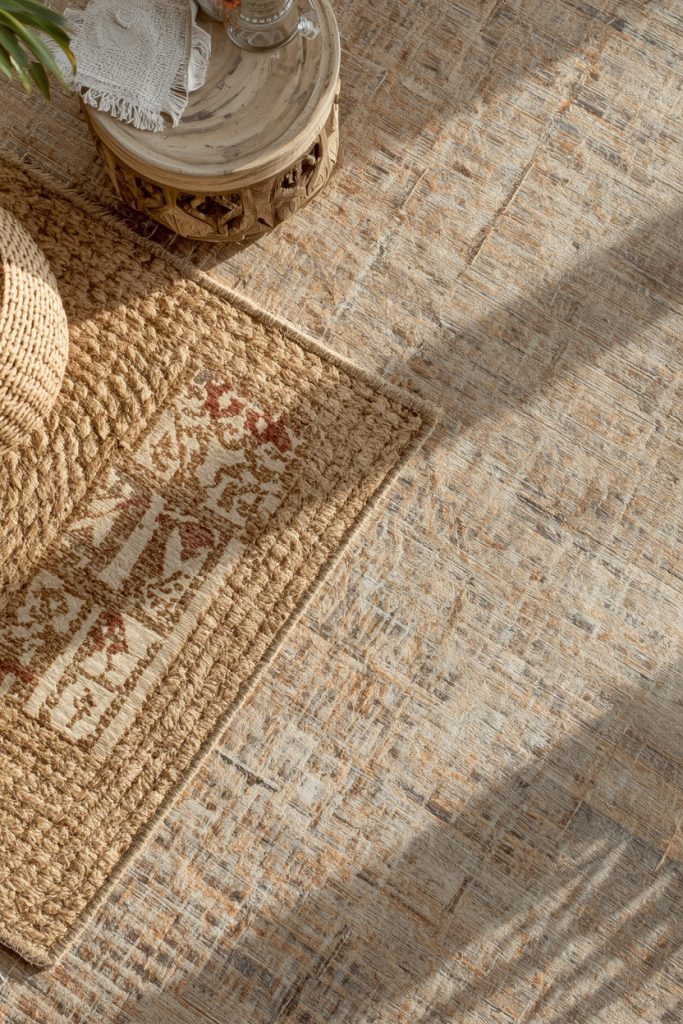
I found this by accident. Couldn’t afford the big rug I wanted so I put a smaller printed one on top of a plain flatweave I already owned. Looked ten times better than either rug separately. The layered thing reads as curated and collected, like the place has history — not like it was pulled together in one IKEA trip on a Saturday afternoon.
Big flat neutral base — jute or plain weave — plus a smaller more interesting rug on top. Position it slightly off-center toward the front of the sofa. The visible border of the bottom rug frames the top one and it all looks intentional. This is probably the easiest thing on this list that makes people say “wait, how did you do that?”
09- Get velvet cushions — but never buy a matching set
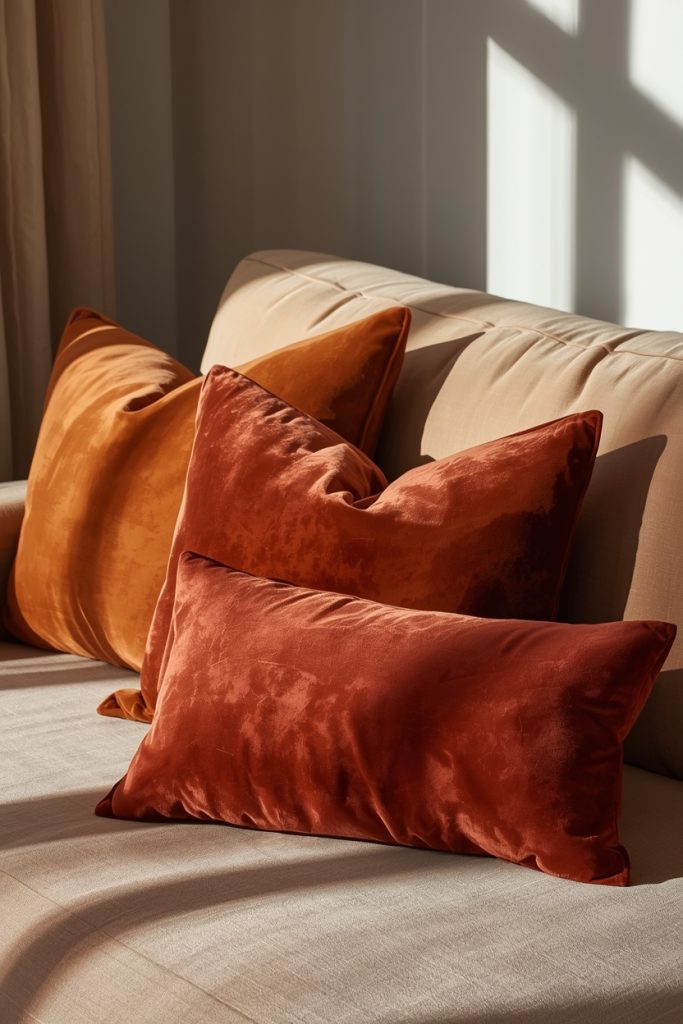
Velvet catches light differently depending on which direction you’re looking at it from. That makes it look rich and textured even in a plain small space. Good choice for a studio. But here’s the thing everyone misses: a perfectly matched set of cushions looks like the sofa came with them included. It’s a showroom look, not a home look.
Mix sizes. One large 22-inch square, one standard 18-inch, one lumbar. Same rough color family — terracotta, rust, warm caramel — but different sizes and slightly different tones. That variation is what makes it look like stuff you’ve collected over time rather than bought in one go.
10- Hang your curtains from near the ceiling — not just above the window
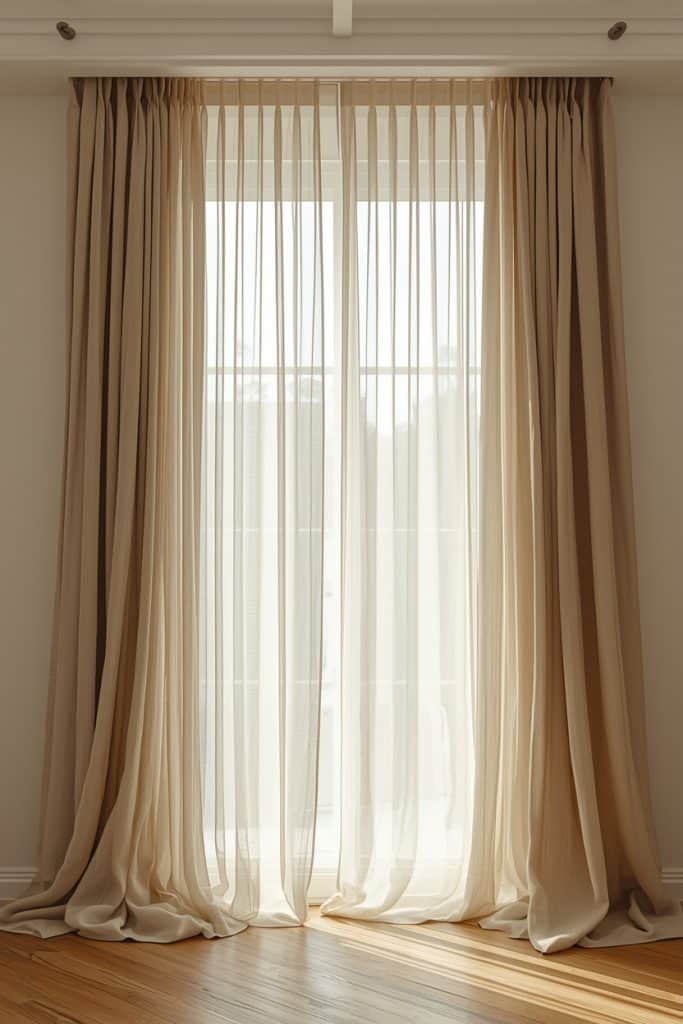
This one gets me every time I move somewhere new and have to stop myself doing it the lazy way. Most people put the curtain rod right above the window frame. That’s the standard, technically correct position. It also makes the window look small, the ceiling look low, and the room look like an afterthought.
Put the rod as close to the ceiling as you can reach. Hang floor-length linen that grazes or pools slightly on the floor. Extend the rod 8–10 inches past the window on each side. Now the window looks twice as tall, the ceilings look higher, and the linen adds exactly the soft texture that hard studio walls are missing. I’ve done this every single time I’ve moved and I’ll keep doing it forever.
Don’t iron linen curtains. The natural wrinkle looks better than pressed. The rumple is part of it.
11- Put a large woven or macramé piece on your main wall
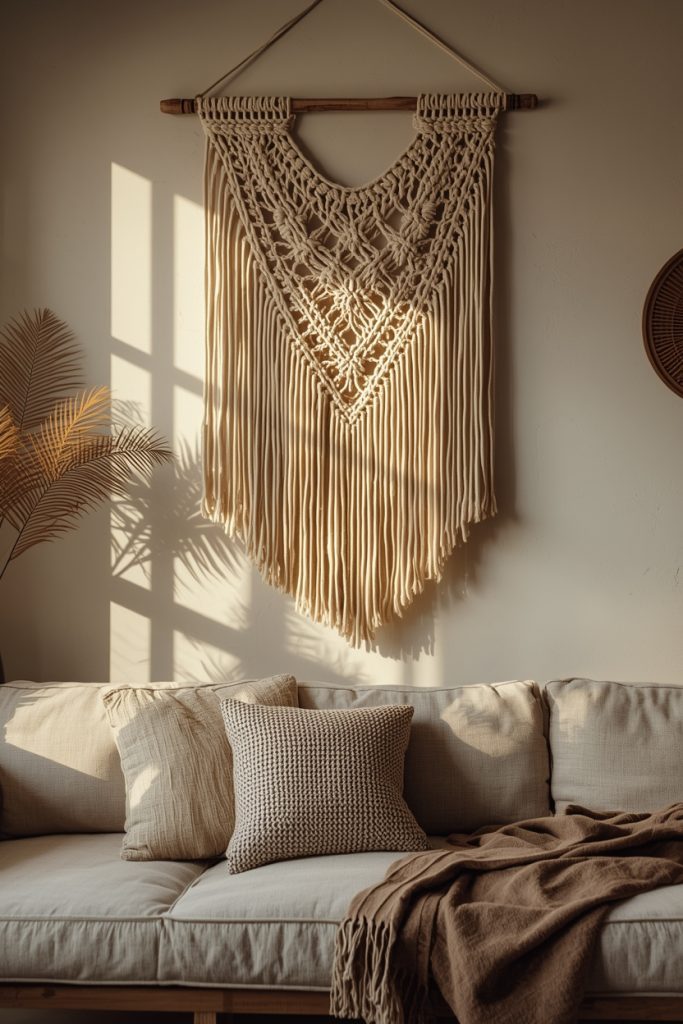
A bare wall in a studio reads as “I just moved in and haven’t got to it yet” even if you’ve lived there two years. A large woven piece changes that instantly. It adds texture at eye height — right where your eye lands when you sit or stand — and makes the wall feel like part of a finished, intentional space.
The size matters more than anything else. Small piece on a large wall just highlights the empty space around it. Go for something that covers at least two-thirds of the sofa or bed width below it. Natural undyed cotton or jute ages well and photographs warmly. Etsy has great handmade options at every price point.
12- Get a boucle accent chair — then actually set it up as a real seating area
Boucle is that nubby looped fabric everywhere in home decor right now. It’s popular because it photographs beautifully and feels genuinely comfortable to sit in. A cream or oat boucle chair looks more expensive than it usually costs and adds more texture per square foot than almost anything else you can put in a studio.
But here’s the important bit that most people skip: don’t just stick it in a corner to look good. Give it a floor lamp behind it and something to put your drink on next to it — a side table, a stool, literally a stack of hardcovers, anything. Make it a real place you’ll actually go and sit. A corner with a clear purpose makes the whole studio feel more settled.
13- Replace every plastic storage bin with a woven basket
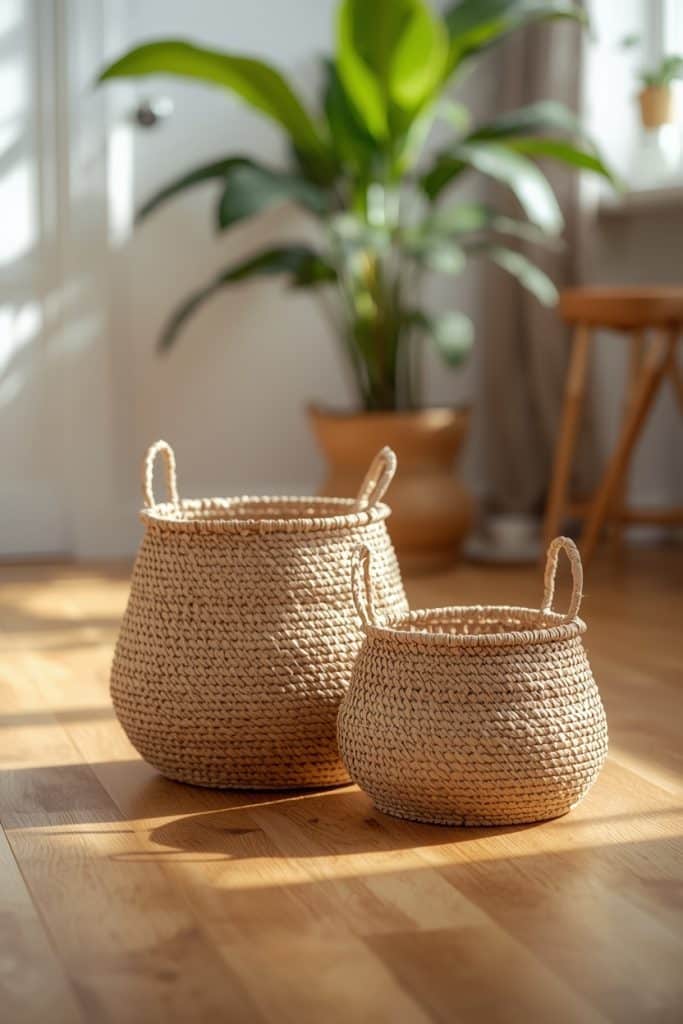
I did this one Saturday in about two hours and it made a genuinely embarrassing amount of difference. Same stuff, same locations, just in seagrass baskets instead of white plastic bins from the hardware store. The studio looked 40% more like a home immediately. Woven baskets read as decor, not just storage. Plastic bins read as “I haven’t sorted this out yet.”
Use them under console tables, on shelves, beside the sofa for throws, by the front door for shoes. Two or three in the same style but slightly different sizes looks intentional. A set of three seagrass baskets runs about $30–35. I’ve bought three different sets across my studios and they’ve all held up well.
Zone tricks that change how your studio actually feels
This is the section that made the biggest difference in my own studios and it’s the one most decor articles barely touch. When everything in your apartment happens in the same open space — sleeping, working, eating, relaxing — your brain never fully switches between modes. You can’t properly rest somewhere you also work. You can’t properly sleep somewhere you also watch TV from. Zone separation gives your brain the signals it needs.
14- Mount a ceiling curtain track to section off the sleeping area
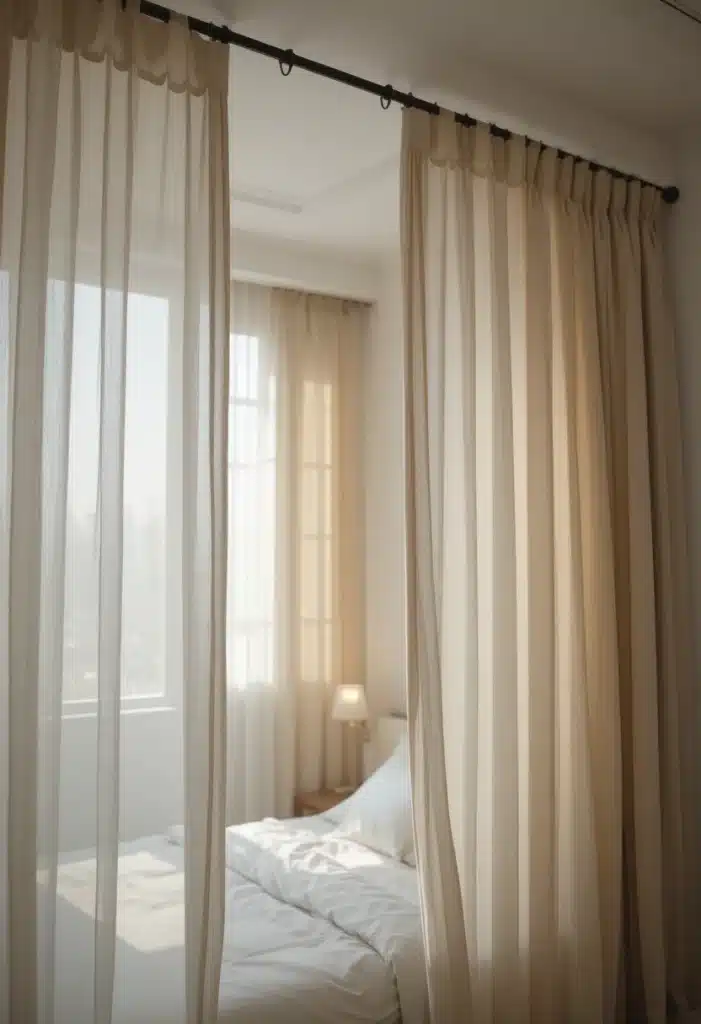
This is the biggest single improvement I made to my third studio. A ceiling-mounted curtain track — mine used a tension system that left zero marks on the ceiling — lets you draw a full floor-to-ceiling linen panel across the sleeping area at night. Draw it closed and you’re in what genuinely feels like a bedroom. You can’t see the rest of the studio. The ambient light from outside doesn’t reach you.
Open it in the morning and the studio goes back to one open space. If you work shifts or sleep during the day, pair a blackout curtain on the same track and you’ll sleep better than you ever have in a studio. This one addition changed how rested I felt waking up every morning. Hard to overstate how much it matters.
15- Turn a freestanding bookshelf perpendicular into a zone divider
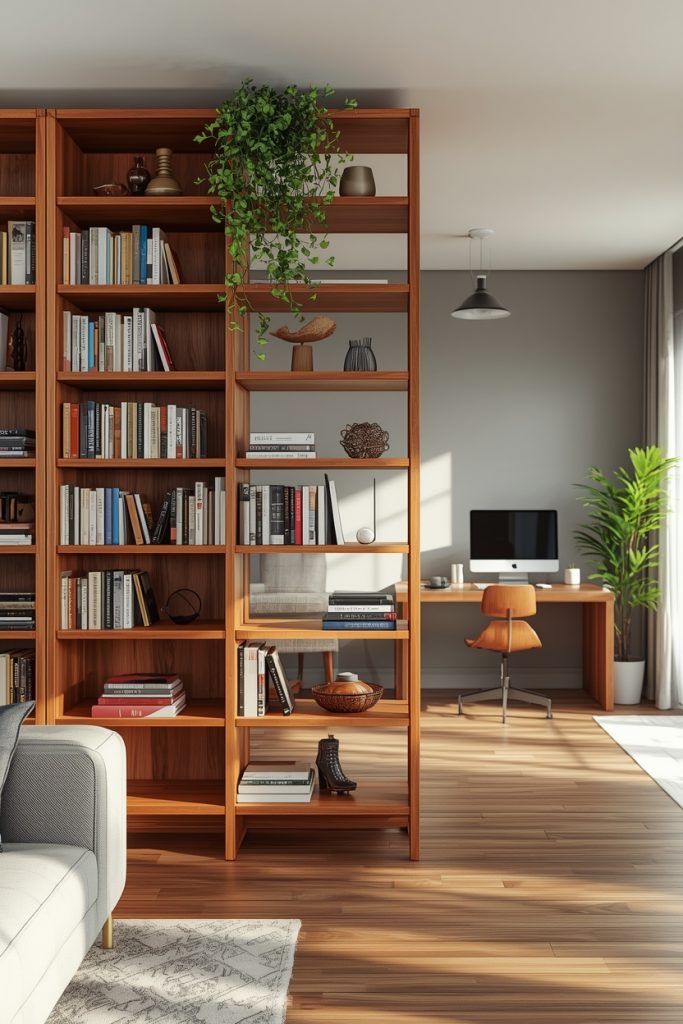
Against the wall it stores things. Angled out into the room perpendicular to the wall it stores things AND creates a soft zone boundary. The open design lets light pass through both sides so neither area feels dark or boxed in. You get storage and zone separation in one move.
Living-room-facing side: books, a couple of plants, small decorative objects. Bedroom-facing side: baskets, more private everyday stuff. A friend came over to my second studio and spent fifteen minutes trying to figure out how I’d made a one-bedroom feel out of a studio. It was this bookshelf. Just the bookshelf.
16- Use a slatted wood screen as a zone separator — and put a lamp behind it
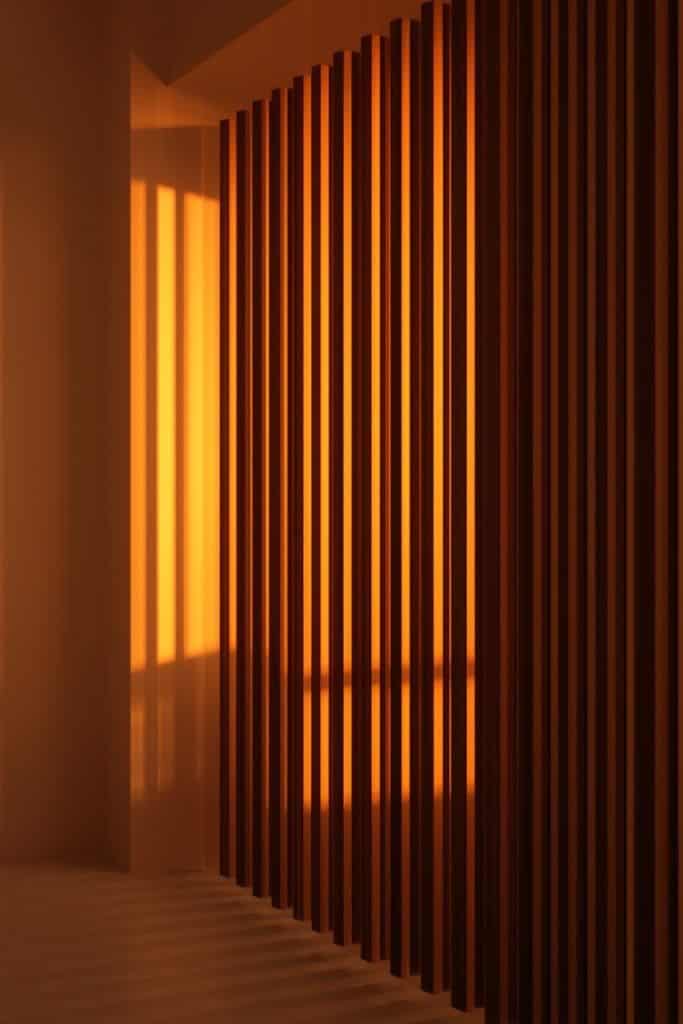
A slatted wood room screen does what a curtain and bookshelf both do but with a more architectural feel. The gaps between slats let light and air pass through while the overall panel creates a clear visual separation between zones. The warm wood tone adds natural texture to whatever side of it you’re standing on.
Put a lamp on the bedroom side at night. The light filters through the slats and throws a striped shadow pattern across the opposite wall. It’s one of those completely accidental effects that makes a studio look like you spent real money on a designer when you just positioned a $60 screen and a lamp. Angle it slightly rather than placing it perfectly perpendicular — looks more natural.
17- Use a rug to define the living zone — and get one big enough to actually work
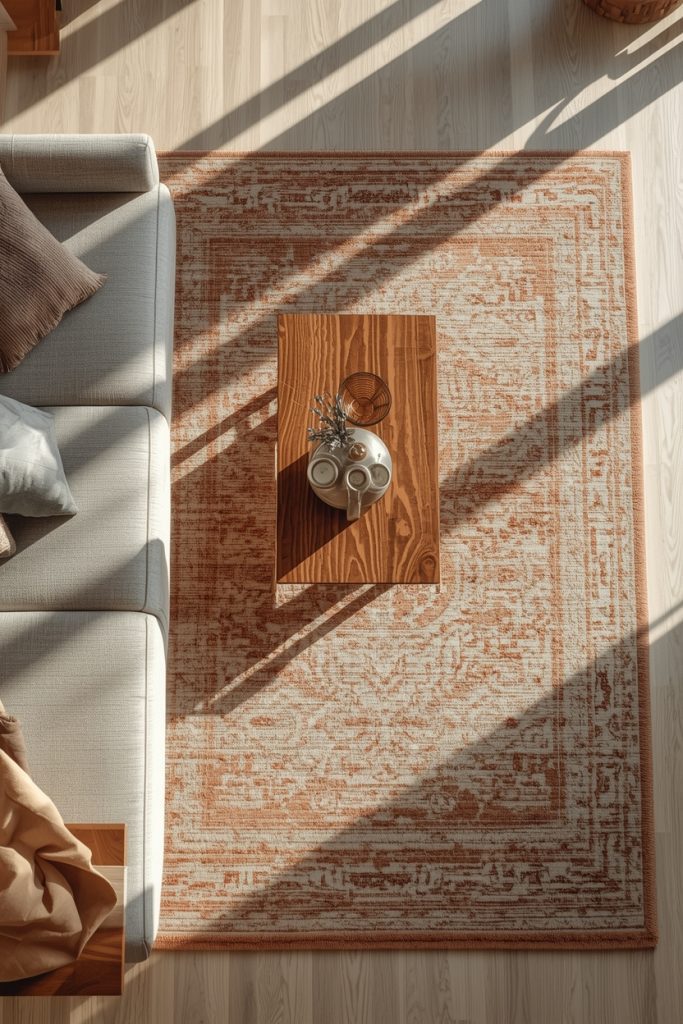
A rug that’s the right size creates a “living room” on the floor of your studio without any dividers or structural changes. Your brain reads the rug boundary as a zone edge. The sofa sits on it, the coffee table sits on it, maybe an accent chair is adjacent to it — and that whole cluster becomes the living area, distinct from the sleeping corner and the kitchen zone.
The most common mistake: rug too small. If the sofa legs float off the edge of the rug, it makes the whole arrangement look worse than no rug at all. The front legs of the sofa need to sit on the rug. Go bigger than your gut tells you. The bigger rug almost always looks better.
18- Position a low shelf across the studio as a half-wall
A low bookcase — about 28 to 34 inches tall — placed across the width of the studio rather than against a wall acts as a soft half-wall. Tall enough to feel like a boundary when you’re seated. Low enough that standing up gives you the whole room back. Sightlines and light flow freely over the top of it so neither area feels enclosed.
Style the top like a mantlepiece: one trailing plant, a small lamp, one or two objects. When it’s styled well it reads as furniture with purpose rather than a makeshift divider. Works especially well between a living area and a small dining corner.
19- Create a canopy bed to enclose the sleeping area without blocking light
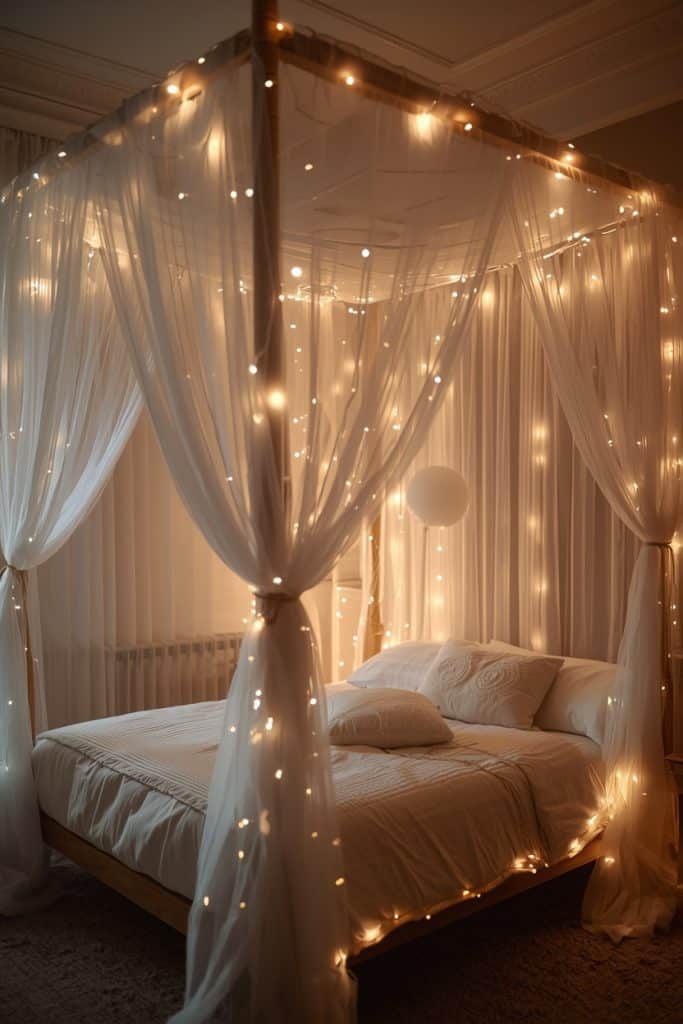
A four-poster or canopy frame with sheer curtains draped from it makes the bed area feel like its own separate room without blocking light or making the studio feel smaller. The fabric creates enclosure that’s soft and light — not walled-off and claustrophobic. During the day the curtains stay open. At night you close them and the bed area completely transforms.
String warm fairy lights through the frame before you hang the curtains. With the curtains drawn and the fairy lights on as the only light source, you’re in a glowing enclosed sleeping nook inside your studio. I’ve stayed in boutique hotels that felt less cozy than this setup done right.
Furniture choices that make a studio feel like a home
Every piece of furniture in a studio needs to justify its floor space. But that doesn’t mean you have to live in a space that feels like a furniture showroom demo for efficient small living. Here’s the stuff that actually works — functional AND comfortable, not one or the other.
20- Buy a comfortable sofa — not just the smallest one that fits
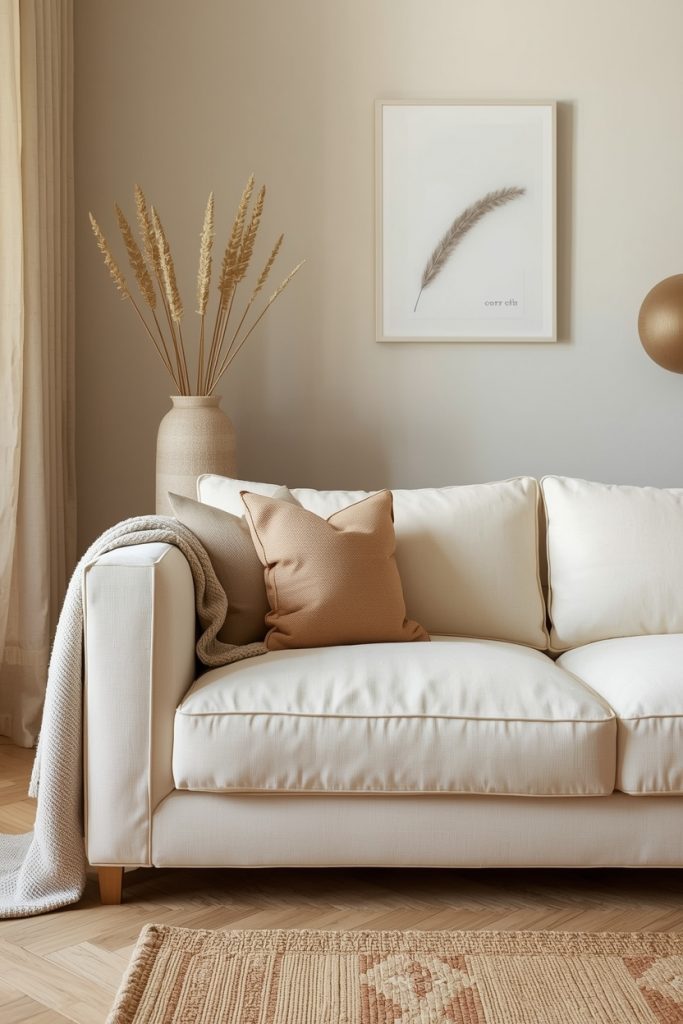
Standard advice for studios: get the most compact sofa possible to save floor space. I followed this advice in my first studio and ended up with a stiff little loveseat that felt like sitting on a church pew. The place never felt relaxing because the main seating never felt relaxing.
Most studios can fit a 72 to 80 inch three-seater if you think about the arrangement properly. Get a deep, sink-in sofa. Light neutral color — cream, warm white, camel — so it doesn’t eat the room visually. The sofa is where you spend most of your waking home hours. Getting it right matters more than any other single furniture decision.
21- Swap the coffee table for a large storage ottoman
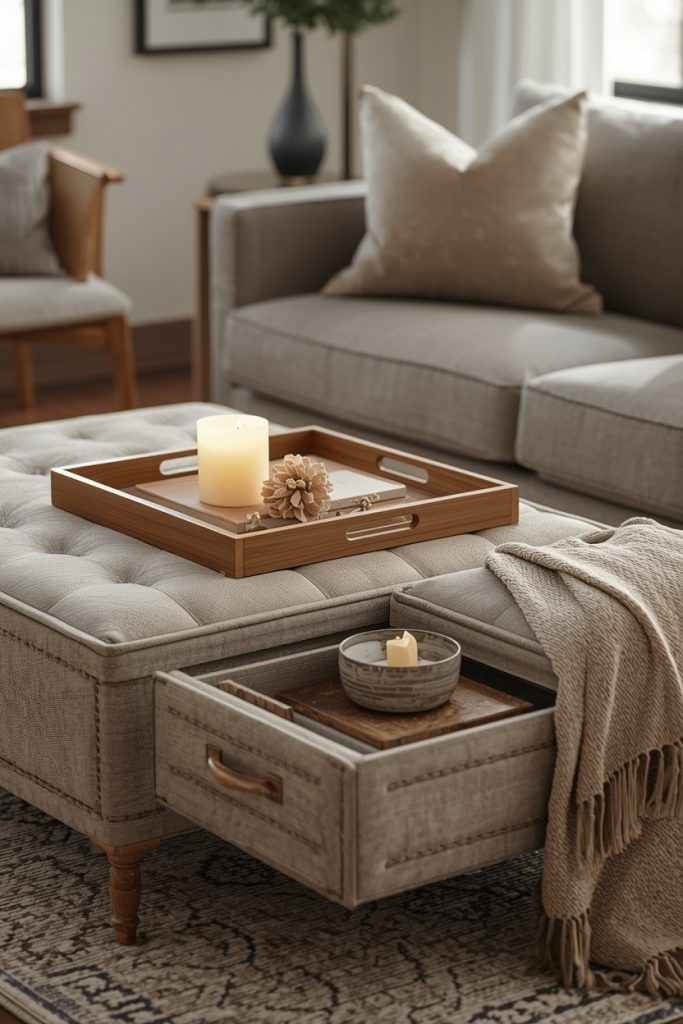
Coffee table: holds stuff. Looks flat. Does one job. Storage ottoman: holds stuff on top via a tray, holds stuff inside via a lid, works as extra seating when someone comes over. Three jobs. Same footprint.
Put a simple wooden tray on top and it functions exactly like a coffee table surface. Upholster it in boucle, velvet, or linen and it adds to the texture and warmth of the room rather than just sitting there looking practical. Round ones navigate better in tight studio floor plans — no corners to catch you on your way to the kitchen at night.
22- Get a platform bed with built-in storage drawers

Under a standard bed frame is the most wasted space in most studios. People shove plastic bins there and forget about them. A platform bed with proper integrated side drawers turns that dead space into serious organized storage — the equivalent of a full chest of drawers, hidden in the base of the bed.
More things stored out of sight means less visual clutter on shelves, chairs, and floors. Less visual clutter directly means the studio feels calmer and more cozy. The bed with drawers is how you make that possible without buying extra furniture.
23- Use a small round dining table — and mix the chairs
Rectangular dining tables have corners that jut out and catch people in tight studio traffic. A round table in the same footprint has none of that. It also feels more like a proper meal setup for two people — nobody ends up sitting at “the head” while the other is on the side. More equal, more social, fits a studio dining corner far better.
28 to 32 inches across is the sweet spot. Mix one wood chair with one upholstered or rattan chair instead of buying a matching set. A matched pair looks like a package deal. A mismatched pair looks chosen. One candle or one small plant in the center. That’s it — you’ve got a dining area.
24- Install floating shelves — and deliberately leave 30% of each one empty
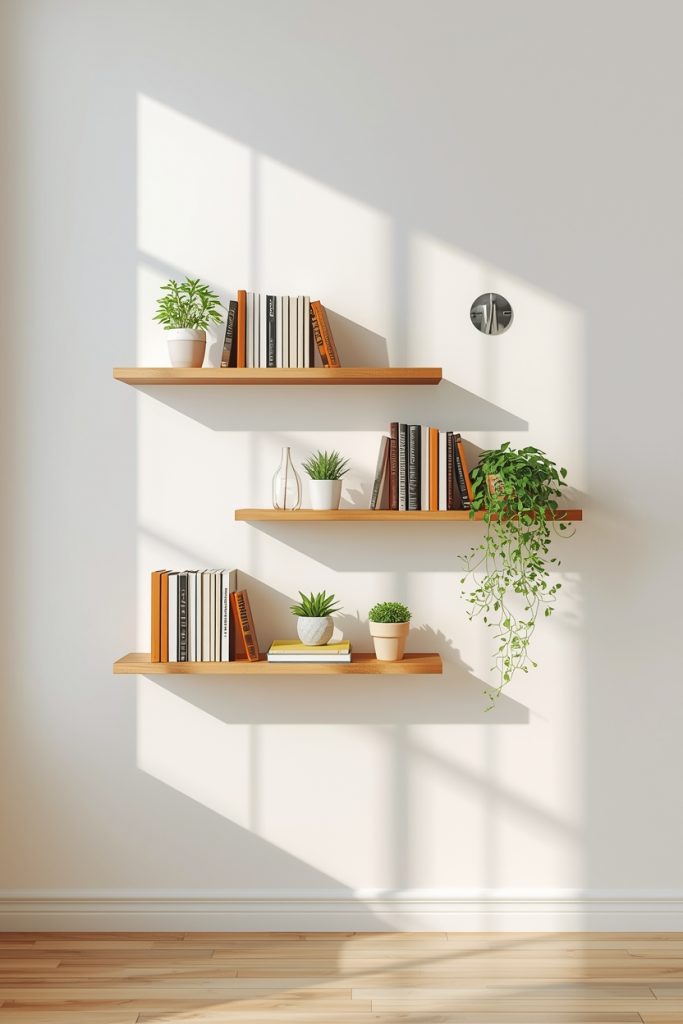
Floating shelves use vertical wall space without taking any floor space. Good in principle. Terrible in practice if you pack them floor-to-ceiling with stuff. A shelf crammed completely full looks chaotic and adds visual noise instead of warmth.
Fill 70% of each shelf. Leave 30% deliberately open. Alternate a small cluster of books with a single plant. Let one shelf hold just two objects with breathing room around them. The empty space makes everything you do display look intentional and significant rather than accumulated and dumped. This is the same principle galleries use — white space is not waste.
25- Lean a large floor mirror opposite a light source
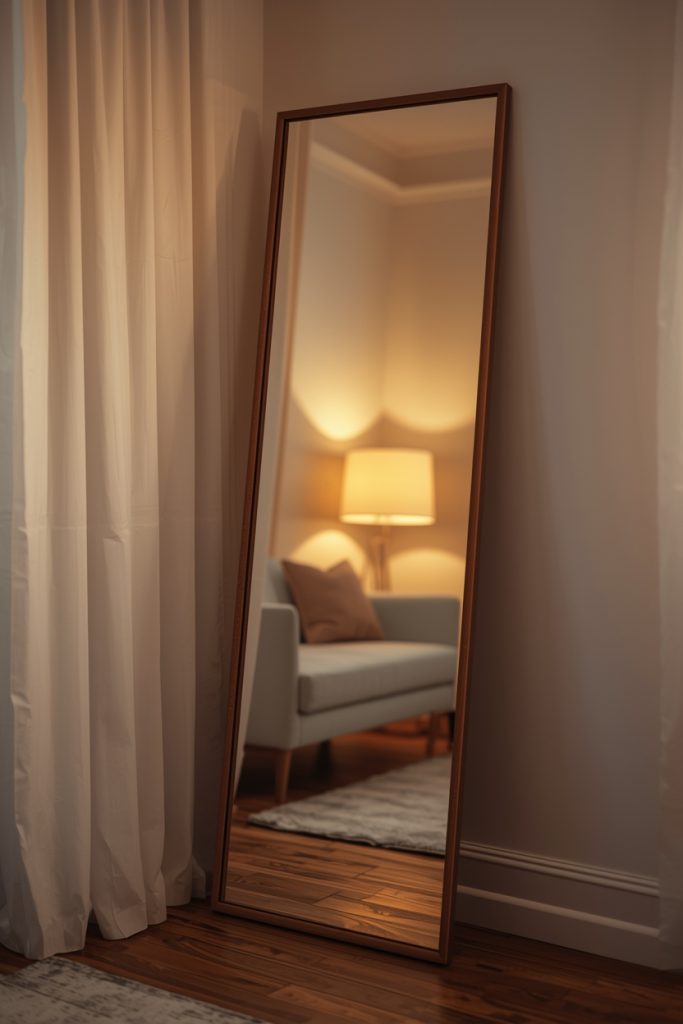
A large leaning mirror placed across from your main window or floor lamp bounces light around the studio and creates the impression that the room extends beyond the wall behind it. It also doubles the visual impact of everything you’ve styled — your warm lamp, your layered rug, your throw — all of it shows up twice.
Lean rather than hang. More casual, renter-friendly, easy to reposition. Thin brass or warm wood frame keeps it looking warm rather than clinical. The one I use I bought for $35 from a closing-down home store. Still the most-commented-on thing in my studio by anyone who visits.
The finishing details that separate a nice studio from a cozy one
Everything up to this point is the structure. Lighting, texture, zones, furniture — get all of that right and your studio looks good. These last five ideas are what make it feel personal. They’re the layer that communicates someone real lives here and cares about the space. Don’t skip this section.
26- Put plants at three heights — floor, shelf, and high or hanging
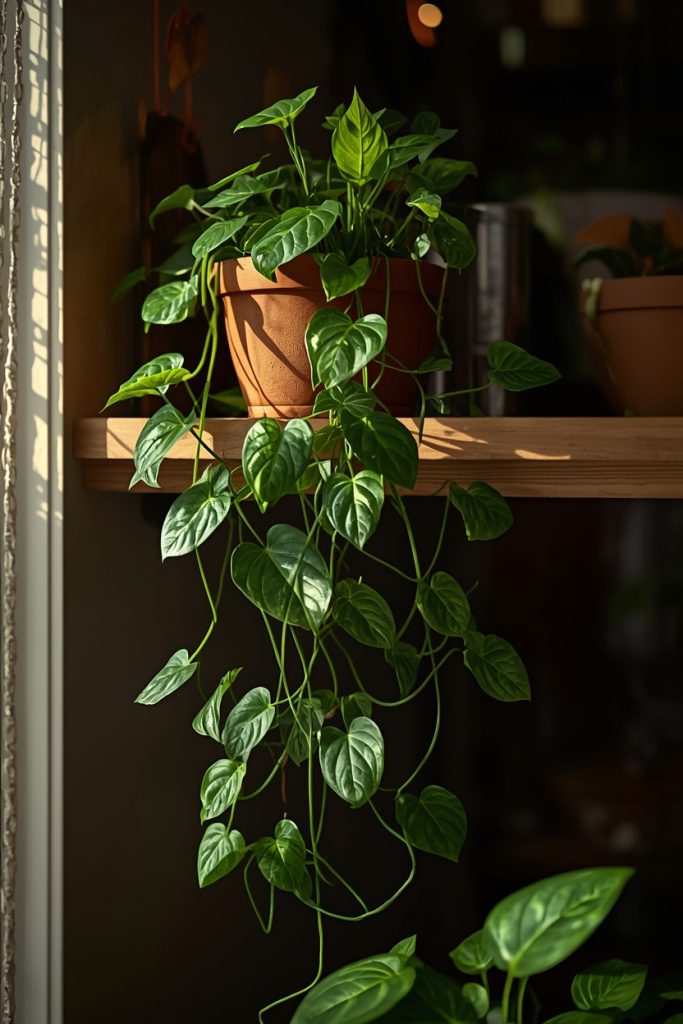
One plant on a windowsill barely registers. Plants at three heights — one on the floor, one on a mid-level shelf, one trailing from a high shelf or hanging — fill the vertical space of the studio and make it feel genuinely alive. The eye moves upward through the different levels and the room feels taller and deeper than it actually is.
For low-light studios: golden pothos, snake plants, ZZ plants. I went on a 10-day trip and came back to find my pothos had grown four new leaves. These things want to live. For trailing high shelves, heartleaf philodendron grows fast and looks beautiful cascading downward. Don’t overthink the pots — terracotta or matte white, that’s all you need.
27- Build a gallery wall on a tight budget — discipline the color palette
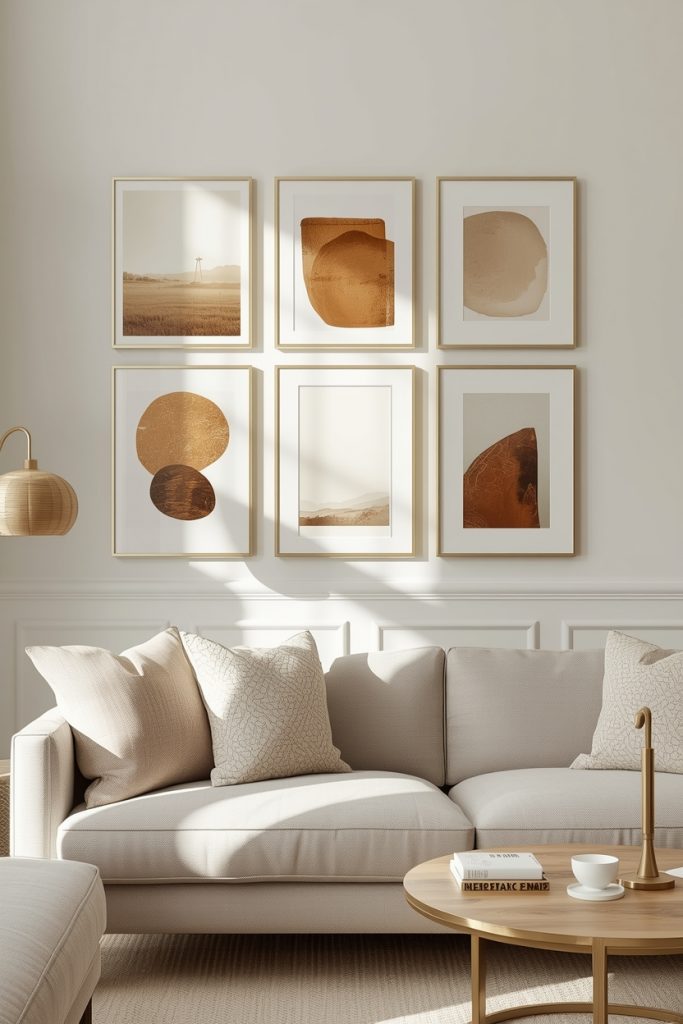
A gallery wall makes a studio feel like somewhere a person has actually lived and built a life. Temporary, transitional spaces don’t have gallery walls. Homes do. The one thing that makes the difference between a gallery wall that looks curated and one that looks random: color consistency.
The subjects don’t need to match. The styles don’t need to match. The colors need to share a family. Mine are all warm — terracotta, cream, warm brown, dusty sage. All in thin brass IKEA frames. The prints themselves came from Etsy digital downloads — $3–5 each — printed at a local print shop. Total cost: around $40 for five frames and five prints. Lay the arrangement on the floor before you put anything on the wall. I learned this the hard way.
28- Pick three warm neutral tones and filter every single purchase through them
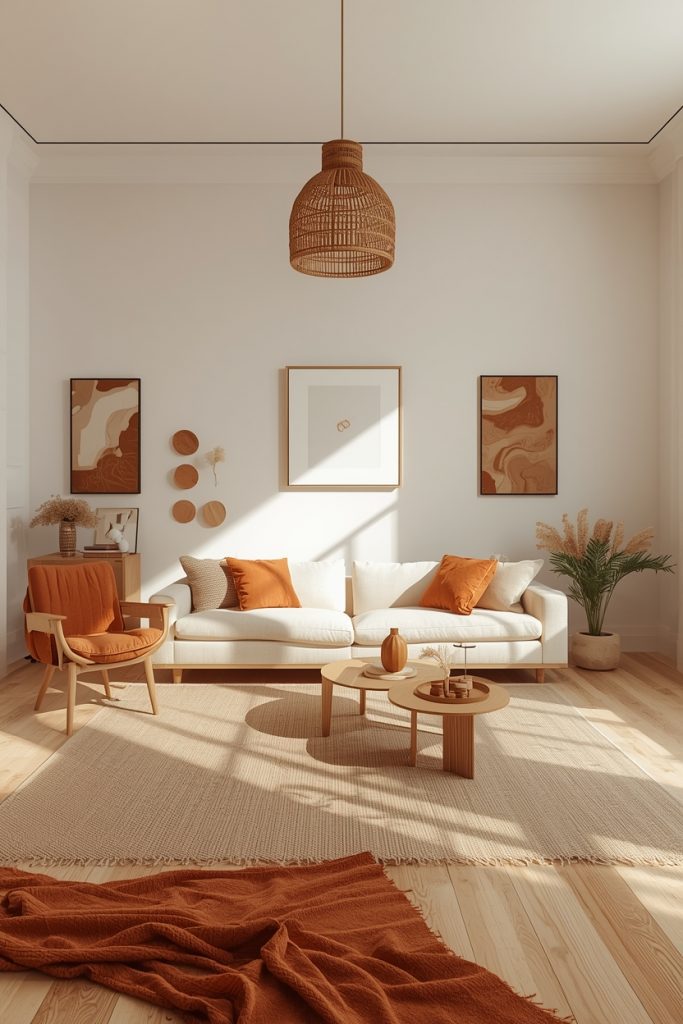
The studios that look most cohesive aren’t the ones with the most expensive things. They’re the ones where every item shares a visual language. You build that by picking three tones and sticking to them. Every time you consider buying something for the studio, you ask: does this fit the palette? If not, it doesn’t come in.
Mine: cream as the dominant base (walls, sofa, bedding), warm beige as secondary (curtains, most soft furnishings), terracotta as accent (cushions, one basket, one vase). Natural wood across all surfaces and frames ties them together. That’s it. That discipline is the whole strategy and it works every time.
29- Choose one signature scent and use it consistently

Scent is the most ignored dimension of a cozy home and I genuinely don’t understand why. Smell is the sense most directly connected to mood and memory. A consistent scent in your studio conditions a response — you walk in, you smell it, your body starts to decompress. Over time it becomes synonymous with “I’m home.”
Pick one and use it consistently across candles and a diffuser so it’s always the same. Warm earthy scents — cedarwood, amber, sandalwood, vanilla — register as calm. Anything sharp or citrus reads as energizing, which fights against the cozy goal. Dried botanicals like pampas or eucalyptus add a gentle background scent with zero maintenance and last up to two years.
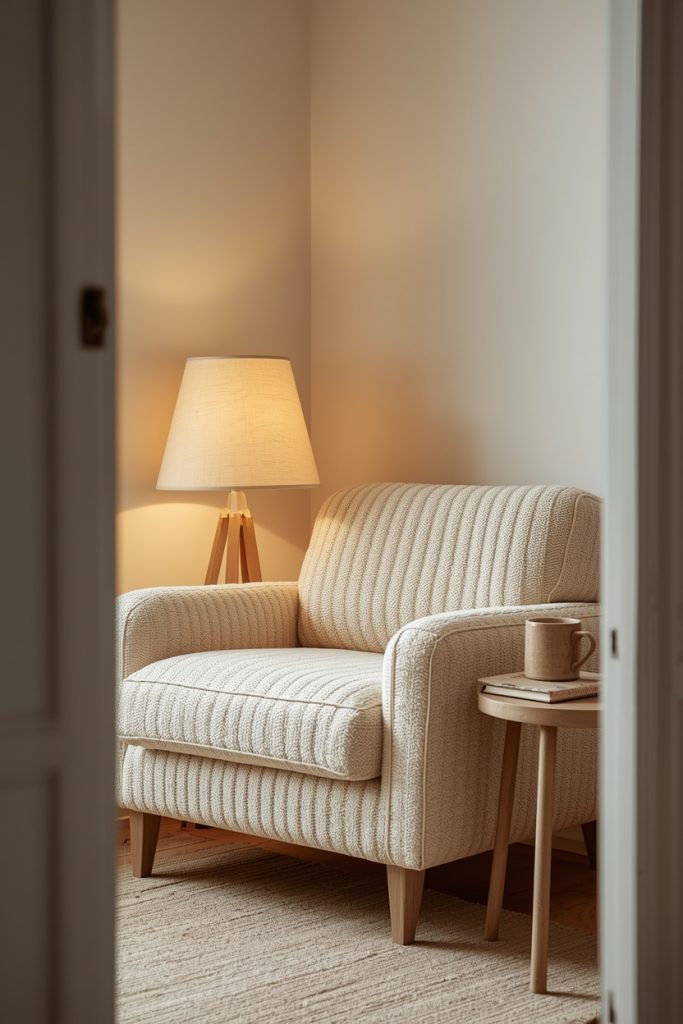
30- Create one corner that has no job except to make you feel good — and protect it
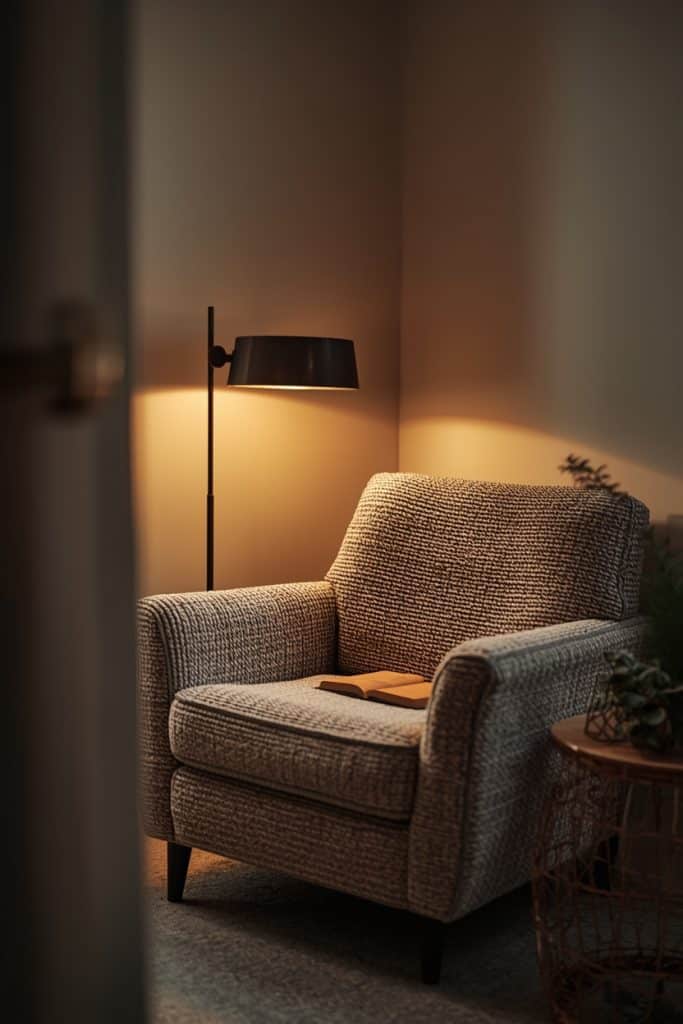
When every corner of your studio is functional — sleeping corner, working corner, cooking area, eating area — and there’s nowhere that exists purely for you to sit and exist without any agenda, you never fully switch off. The space always has a task attached to it somewhere in your peripheral vision.
One comfortable chair. One lamp. Something to put a drink on. That’s the whole reading nook. The rule: no work goes there. No laptop, no phone charging unless you’re reading from it, no to-do list within eyeline. This corner became the reason I looked forward to being home in my third studio. It’s not a big thing. It’s just mine. That’s the whole point.
Protect it. The moment work starts creeping in, it stops doing its job. Don’t let it happen.
Highest-impact cozy upgrades under $50 — start here if money’s tight
You don’t need to do all 30. If I had to point someone toward the ones that make the most noticeable difference for the least money, these are them. The first three together cost under $55 and will make your studio feel measurably different the same evening you do them.
| THE UPGRADE | WHY IT MATTERS | COST |
| Warm white LED bulbs — 6 pack, 2700K | Highest ROI change on this entire list. Do this first, tonight. | ~$12 |
| Plug-in lamp dimmer | Full mood control from your floor lamp. No wiring. Takes 30 seconds. | ~$14 |
| Warm white string lights — 33 ft | Ceiling perimeter cove lighting that makes the room feel like a lantern. | ~$15 |
| Chunky knit throw blanket | Most-saved cozy decor item for a reason. Also actually warm. | ~$28 |
| Sheer linen curtain panels — pair | Softens windows, adds texture, makes ceilings look taller hung high. | ~$20 |
| Velvet cushion covers — pair | Instant sofa texture upgrade. No need to replace the sofa itself. | ~$22 |
| Scented soy candles — 3 pack | Visual warmth plus signature scent layer. Cheapest atmosphere upgrade. | ~$18 |
| Floating shelf — MOSSLANDA or similar | Vertical display and storage with zero floor footprint. | ~$15 |
| Seagrass basket set — 3 sizes | Replaces plastic bins with organic texture. Looks expensive, isn’t. | ~$35 |
| Dried pampas or botanical stems | Organic texture element. Zero watering. Lasts up to two years. | ~$18 |
✅ IF YOU ONLY DO THREE THINGS THIS WEEKEND
- Swap the bulbs to 2700K warm — $12
- Get a plug-in dimmer for one lamp — $14
- Buy one chunky throw — $28
Under $55 total. Your studio feels different tonight. Everything else on this list builds on that.
Questions people actually ask me about studio apartments
How do I make my small studio apartment feel cozy on a budget?
Start with the bulbs. I know I keep saying it but the lighting situation in most rental studios is genuinely the root of about 60% of the “why doesn’t this feel like home” problem. Swap to 2700K warm white LEDs — $12. Add a plug-in dimmer to your main lamp — $14. Pick up one chunky throw — $28. That’s the first $55 and it will make a noticeable difference the same evening. Everything else after that is incremental. One basket, one curtain panel, one plant. Cozy builds slowly and every step feels like a genuine improvement.
What colors actually make a studio feel cozy — not just look okay?
Warm neutrals. Cream, oat, warm beige, camel, terracotta, dusty sage. Natural wood in any shade ties all of them together. These tones reflect light back in a way that feels golden and soft rather than harsh and flat. Cool greys and stark whites do the opposite — they reflect the kind of light that makes a small space feel like a bathroom changing room. Pick three warm tones and stick to them. Filter every single purchase through those three before it comes into the studio. That discipline is the whole strategy.
How do you separate zones in a studio without building walls?
For renters: a ceiling-mounted curtain track for the sleeping area is the most effective option and the most invisible when it comes to move-out time. No wall damage, no permanent fixtures, takes a Saturday afternoon. If that feels like too much, a freestanding open bookshelf turned perpendicular to the wall creates a soft boundary without blocking light. At the very minimum: a large area rug under the sofa that’s actually big enough for the sofa legs to sit on. That alone creates a “living room” zone that the brain recognizes as distinct from the rest of the studio.
What furniture mistakes actually make a studio feel worse?
Furniture with no legs — pieces that sit flat on the floor make a room feel heavier and more cramped because you can’t see the floor beneath them. Dark, heavy finishes that absorb light. Single-purpose pieces that take up floor space without earning it. And the one I see constantly: a rug that’s too small. If the sofa legs aren’t sitting on the rug, the rug is working against you. It makes the arrangement look smaller and more awkward than no rug at all. Go bigger than your gut tells you.
What plants survive in a low-light studio apartment?
Golden pothos, snake plants, and ZZ plants. These three specifically because they survive neglect better than almost any other houseplant. I’ve left my pothos unwatered for two and a half weeks and it was fine — slightly dramatic about it, but fine. For high shelves where you want a trailing effect, heartleaf philodendron grows fast and looks genuinely beautiful cascading downward. Put plants at three heights — one on the floor, one on a mid shelf, one trailing from a high shelf — and the studio comes alive in a way that one plant on a windowsill never achieves.
Your studio is already closer to cozy than you think
The size of your apartment is not the problem. I’ve been in 900-square-foot apartments that felt cold and unsettled and 360-square-foot studios that felt like the most comfortable place I’d ever lived. The difference was never size. It was decisions — lighting, texture, zones, and having one corner that existed just to make coming home feel worthwhile.
Pick one idea from this list. One. Do it this week. See what it does to the space and how you feel in it. Then come back for the next one.
You don’t build a cozy home in a weekend. You build it in 30 small decisions that stack on each other over time. Start with the bulbs.
📌 Save this to Pinterest before you lose it — I update this guide when I find new stuff that actually works. And if you’ve got a cozy studio tip that I missed, leave it in the comments. I read every single one.